Tuesday, August 13, 2013

post 6, question 1

I've decided that I have to start doing the research questions, otherwise I won't have time to finish them in time as a lot of assignments keep coming up.

1.     Choose 2 machines that you used in the fabrication of your desk tidy. With these machines in mind, outline WPH&S considerations that must be adhered to when using these machines. Include photographs of your chosen machines (OnGuard may be an excellent resource for this question).
 
 
BAND SAW:
Considerations that should take place:

  • Only one person using the machine at one time
  •    Any hair should be tied back or in a hair cap
  • when cutting the pieces, if one of the pieces should be moved, don't move it with your hands, sue something else to move it and then pick it up
  •  if dropped something, don't go down with your head close to the machine, move it with your foot and then pick it up
  •      Safety glasses must be worn
     blade should be in properly

2) SANDER:


Considerations that should take place:
  •  Safety glasses must be worn 
  • Make sure sanding disc and belt is in good condition
  •    Make sure you know what direction the belt and disc in going
  • don't put hands too close to sander
  • hair should be always tied at the back
  • just one person in each work area

Thursday, August 8, 2013

5 post

On last lesson I started banding my pieces. I had problem with one of my pieces, because I banded it, there was a small space left over. Then I decided to redo it. But when I redone it, I got the same thing, then I thought that i can fix it by putting second box in there. I think, that it is confusing on words, but I'll try to take a picture of it and then it will be easier to understand what I mean.
On last lesson I've done just 2 boxes, so next lesson I have to do so much work to do, as our project has to be finished at the end of week 5 or on the first lesson of week 6. Because we have to start doing our theory research questions.
Here is plan for me to complete on the next lesson:
1) Glue two boxes
2) Band 2 other pieces and make 2 more boxes
3) And finally glue everything together.

Tuesday, August 6, 2013

4 post

On today's lesson we were doing our projects. I'm up to a stage of banding my plastic pieces. But on today's lesson I was sanding the edges. Because I have long but small in width pieces I couldn't use the big sander, because its a bit scary and dangerous to do. So I asked Mr Andrews to sand them on small sander. That meant that I had to divide the long piece into 3 parts and sand them separately. Starting with left side, then middle part and the right one at the end. But because I couldn't really control everything to make the surface exactly flat, I had to use sanding paper afterwards. 
When I did it, I took the paper off(the paper that is on top of the plastic) and Mr Andrews said that my adages are not quite flat. So I had to work on them more with this paper. But because my plastic doesn't have any protection on it-I have to work really carefully because I can damage plastic surface. 
On the next lesson I will have to fix my edges and then if I'll have time, I will probably start banding my plastic and put all the pieces together. I don't think I'll get up this stage, but I'll try to, because then I can have more time to work on my theory part of an assignment.

Monday, July 29, 2013

3 post

On last lesson I've started doing prototype of my desk tidy from cupboard. While doing that I've realized some things that I had to change and I actually changed them during the process. I changed lengths of the sides so I could use less cupboard. I have 4 small "boxes" where I'm going to put my jewelry. I think I'll finish my prototype next lesson, and when I do-I'm going to put a photo of it on the Blogg.  

Thursday, July 25, 2013

2nd post


Well, on yesterday's lesson I realised that we are allowed to make a desk tidy for our jewellery. So I've decided to change my design. I'm going to put my rings, necklaces, earrings a d some other things in there. I think 4 'boxes' will be more than enough. As our desk tidies has to be not bigger than 20 by 20 by 20 cm, so I've decided to make it 20cm in height, 10 cm in width and 14 cm in length. My new design looks like so: 
And here are some 1:1 scale drawings of my desk tidy.

Tuesday, July 16, 2013

term 3, post 1

On todays lesson we started doing our new assignment which is desk tidy. Firstly we had to do research of different desk tidies and then start planning our own desk tidy. In the internet I found a lot of desk tidies of different shapes and colours. But I need to look at all of the examples and make my own desighn, not copy of someone's design. We firstly had to decide what thigs we were going to put into our desk tidy. I'm going to put there my Iphone, a cup, pencils and pens,and some paper sheets. So I need a desk tidy that can fit in all of these things. Here are some pictures that I found in the internet.

-I really like this desk tidy because there is a space for the phone, some paper, pens, pencils and small things.

-I don't really like the design and I think it's too small. 

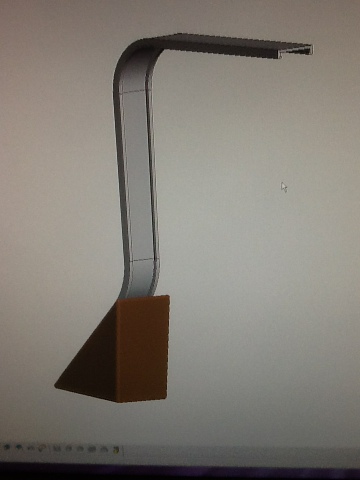
-this one looks modern, interesting, good for teenager, but there is no place for my phone and a cup, so I don't think this design will be the best for me.-This desk tidy includes a lot of different trays for paper, small things,etc. But I don't really like the way it's done and I think that this desk tidy will take a lot of space on my table.


And here are some of my drawings.


And this is my final one, that I really want to make.
Here is my design of desk tidy with a stand for my iPhone, a space for a cup, a box for pens and pencils and a small box for the small things. It also has space for paper at the back. The stand fornthe iphone is small because it doesn't need all 4 walls, so it has just one short wall at the front that will stop the phone from falling. I will also be able to put some paper at the back of the desk tidy and stand for pens and pencils. I also tried to find a desk tidy that have a place for a cup and I decided to place my cap in the middle of the desk tidy. It doesn't have any walls because I need to get it out and put it back as easy as possible. 


Wednesday, June 5, 2013

5th post

on todays lesson I've finished doing my lamp in the program ProDesktop.
I've done my base, aluminium piece and the LED bulbs and put al the parts together. I had some trouble with turning the pieces and putting them under one angle. But yesterday Mr Andrews showed us how to do it. It was still confusing but I tried couple of times and then I finally got the right angle I wanted and put all the pieces togeter.
this is the picture of my finished lamp