Friday, November 8, 2013

Post 10. Final evaluation

To finish my mechanical toy I still had to paint it. I used acrylic paint, but the colour wasn't bright enough so I painted two or even three layers everywhere. I painted the followers but not the ends, so they could touch the cams and work properly, I also did my top part, I think I got some paint into my holes for followers, because when I tried to play with it, the followers did go through the holes, but they weren't loose and therefore my mechanism didn't work properly. So, I need to go to the workshop on the lunchtime on Monday and drill the holes one more time, in order to make extra space in holes and make the followers to up and down without any friction.
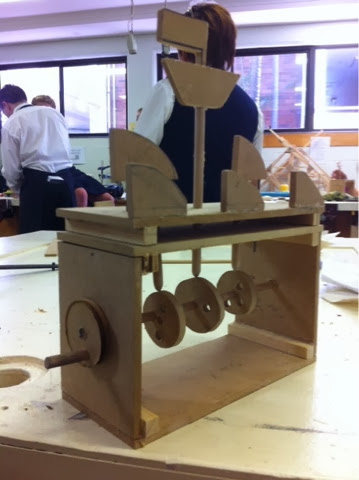
I also recorded all the steps of painting my mechanical toy:)

1) BEFORE

2)ALL OF THE EQUIPMENT 


3)AFTER

Thursday, November 7, 2013

Post 9

Today we had last lesson in workshop and we were supposed to finish or mechanical toys. 
So today I finished making my ship, I sanded the edges, glued it on top of the follower and got all the cams fixed. 
So, I had my mechanical toy pretty much finished and I had to just test it and see what's goes right and what goes wrong and fix it. When I tested it, I realized that my front waves go up and down as they were supposed to, but they also span around. So I had to drill small holes at the end of the waves and the holes that are parallel to the ones in the waves. Then we putted pieces of wire in those holes, so they would kind of support the waves and stop them from turning. 
 My cams would hardly work because it moved the top part, so I had to make it stay still. Mr Andrews showed us how to do it, we just had to drill the holes through both of the tops and into the side of the box and then put the wire in that hole. But I thought it would be easier if I did the same thing but on the sides of the box, so it went through the side wall and into the pieces of wood that are joined with the top. When I did so, it worked out really well, it's now working properly. So, at the end of this lesson i had my toy finished and ready to be played with. I also took couple of pictures of my mechanical toy. 
So now, I will paint it on the weekends and bring it back on Monday for Mr Andrews to get it assessed. 


Post 8

On today's lesson I made all the round cams. The only problem I had was using mini- band saw. It was a bit harder than I thought it would be. But fortunately for me I had to cut just one cam out. My cam wasn't really accurate so I had to sand it down. When I've done it, I got the cam still not perfect one, but good enough to make my mechanism work. 
I've also finished my box, so now I'm going to make my design which is on top of the box. Next lesson I will need to make 3 small waves that are not moving and are situated at the front and 2 big waves that are going to move and which are situated in the middle as the have to be held on the axis. Next lesson I will also need to make a sail boat. Everything will be made from the timber, except for the sail, I'll make it from the cupboard. 
That's what I had at the beginning of the lesson. 


This picture  shows what I got at the end of this lesson.

Tuesday, November 5, 2013

post 7

Today we went to the workshop on the lunchtime with Mr Andrews, as we are running out of time and we won't be able to finish our mechanical toys. Jill and I were late because we were doing her history speech. But on today's session I've fixed 2 out of 3 cams and next lesson I will just need to finish the last cam and check that everything is working.

Thursday, October 24, 2013

Post 6

On today's lesson a lot of people were absent because of the softball. Everyone got a lot of work done. On today's lesson i finally learned how to set up a drill with round nozzle to make circular cams and I'm not freaking out now when using the drill, which is a big step up for me. Today we were talking that we might not get our work done before the end of term, so I've changed my design a bit, so it will take me less time to finish. I've decided that I'm going to make just one ship instead of two and I'll have just two waves moving, instead of three. I got 2 cams done, I had time to make just one hole and so I have just one offset cam now. So next lesson I will need to make last cam to be offset cam. I will also need to make a pear shaped cam for the ship. 
For our homework tonight we have to do 1:1 drawing of all the cams that we are using, how they are working and where they are situated in the box. 

So today's lesson was really productive for me, I need to work hard, because we have just 6 lessons left and a lot of work to be done.

Tuesday, October 22, 2013

Post 5

On today's lesson we were down in workshop. I made a hole for the small circle that goes on the end of an centre axis. Mr Andrews said that my sides are moving, this means that I used not enough glue, so I took both sides off and redone it with a right amount of glue. I also used this thing that helps you check the right angle of the things. The only problem that I had was the extra glue on the surface of the timber. I had to take it of as the side edge wouldn't fit in there. I also got rid of the extra timber that was supporting the sides, I also sand it down. We also got a lot of homework for tonight. Apart for the Blogg, we have to do a list of cams that we use, their 1:1 drawing and errors showing where  they are situated in the actual box. 
So next lesson I'm going to start making cams. 

Friday, October 18, 2013

post 4

On today's lesson I did a pretty good job, it was a productive lesson for me. I finished the box for my mechanical toy. So the biggest problem for me was to cut the circles using the drill as it is kind of dangerous and I was scared at the first time, but then when I've started using it, I realized that it's not that hard and scary actually. Another problem that I had was probably putting this center-stick into the bigger circle and glue it. because it was a really good glue that sticks two parts together in couple of seconds, so I had to do it quickly. And to my surprise the stick got stuck in the circle and didn't want to go all the way through it, so I've used a hammer to give it some more pressure and it went too far away, like to the middle, so i had to pull it up again. It was hard, but funny. But I finally got it right, I think I've solved the problem really quickly and in a fun way.
I've also done the small circle for another side of the stick, but I still need to make a hole of a right size. So next lesson I will finish doing that, and then I'll start making the cams, I will need two offset cams for the ships and three for the waves. That's my plan for the next lesson. But if I'll finish doing that, which is unlikely to happen, but if I do, I will start cutting the design of my top part of the toy.
That's my box and the small circle that I am going to finish next lesson.


Wednesday, October 16, 2013

post 3

Today's class wasn't productive to me, as didn't really do anything. Emily and I are far behind the girls and we needed Mr Andrews to show us what to do next. But because Mr Andrews is one teacher for the whole class and everyone needs help, we got to see him just once. When we did, he told us to sand down our pieces perfectly, so they are all of the same size. Then we had to put the small part on top of another small part and then draw two diagonals to find the center. When we finished everything that we were asked to do, we were told to pack up as there were only 10 minutes left of the class. So on tomorrow's lesson I have to work really hard and don't waste the time, because I need to catch up and my design is quite complicated, so I will probably spend a lot of time on it.

Friday, October 11, 2013

Post 2

On today's lesson we did theory. We looked at two programs on the computer. One of them was "Mechanisms" , where we were learning about different motions, way to lift the object in the mechanical toys,etc. Another one was called "Mechanical Toys", where we looked at some examples of the mechanical toys. Then we had to research some designs and we could also think of some ideations. I didn't want to copy someone's work, so I've decided to research some ideas, but think of my own design. I here are some ideas that I found in the Internet. 


I really liked the idea of the ocean and the boats, so I've decided to do these theme, but change it a little bit. I also had some of my own ideas. Like these ones for example.
On this picture I had a Chritmas tree on the right hand side. I thought that I might use rotary motion, that means that it was going to spin round. On the left hand side it was going to be a stand with 'Merry Christmas' writing on it, that had to go up and down. The pear shaped cam would make it move.  I thought of this idea as Christmas is coming up soon. But I thought it was too boring. So I've decided to try to make a changed version of the "Ocean motion". Here what I got:

Wednesday, October 9, 2013

Term 4, post 1

On today's lesson i started the box for my mechanical toy. Everyone else in the class has already started in on the last week of school in term 3, but because I wasn't there, I had to start yesterday. We were shown the plan for the box and then we had to draw 4 pieces on the timber, cut them out and sand them. This work had to be accurate because this was the base of the toy and everything had to be of the same size. So next lesson we have to glue 3 part together and leave 4th part as a top part. And I also have some more things to do next lesson, because I need to catch up. 

Wednesday, September 4, 2013

post 13

Evaluation of your design in terms of aesthetics, function, ergonomics and economics.


Aesthetics.


Well, my design looks alright. However, my first design was quite different but during the process, i realized that it wouldn't work and had to change it. The new design looks pretty good and modern, but when I was gluing the part together, the boxes moved and they are not perfect rectangles, but fortunately it cant we seen, if you don't know about it.


function 

My desk tidy is still i the workshop and haven't check it. But I recon its function is going to be good. As I'm going to give it to my mom and she has a lot of jewellery, my present will be really suitable. The desk tidy is green, which is her favourite colour, so it is another positive aspect of this project. It doesn't take much space which is good, because it has to contain a lot of things but occupy 

ergonomic 
My desk tidy is pretty ergonomic. The hand can fit in the space between top and bottom boxes easily. All the things that are in the bottom box can be taken out without much effort.  


economics

I don't know how much money would it cost to make the desk tidy, because the school provided all the materials and equipment.

Tuesday, August 27, 2013

Post 12, question 4

For the question number 4 we have to find the total surface area of the plastic that we need to make our exact desk tidy.  So I've decided that I'm going to find the surface area of each piece and then add all of them together.


1)because my top boxes are made of stripes and bottoms. So I have to find the surface area of a stripe and then the SA of the 'bottom parts' and add them together.

 top box on the left:

Length= 7.5+6.5+7.5+6.7
= 28.2 cm
SA= L * W
SA= 28.2 * 3.1
= 87.42 (square cm) 

2)Top box on the right:

Length= 10.5*2+6.5*2
=34 cm
SA= L*W
SA=34*3.1
=105.4 (square cm)

3)Left box on the bottom:

Length= 9.5+7+9.5+7
=33 cm
SA= L*W
SA=33*3.1
=102.3 (square cm)

4)Right box on the bottom:

Length=7.55+6.2+7.8+6.5
=28.05
SA= L*W
=28.05*3.1
=86.96 (square cm)
 
5)To find the SA of all the stripes, I have to add all the SA's together
SA of all the stripes= 87.42+105.4+102.3+86.96
=382.08

6)The SA of top 'floor'
15.4*6.4=98.56 (square cm)

7)The SA of a support thing that holds top boxes in a right place:
13*8=104 (square cm)

8)The SA of the back wall:
20.3*18=365.4 (square cm)

9)The SA of the base:
10.5*18=189 (square cm)

10)To find the total surface area (TSA), I have to add all the previous SA together.
TSA= 382.08+98.56+104+365.4+189
=1139.04 (square cm)
=0.113904 (square m)


Thursday, August 22, 2013

Post 11. Desk tidy is completed and ready to be used! :)

On yesterday and today's lessons we were down in workshop. I was finishing my project. 
On yesterday's lesson I had to glue everything together. And I was done,when I finished it. However, when I did so, I realized that my top and bottom boxes weren't perfect rectangular shapes, but because I already glued everything together and I couldn't move them anywhere. So I had to leave them. When I glued all the parts and I actually got my final shape, everything was good for me, except for the boxes. But I can't do anything about it, so I'm still pretty happy with my desk tidy. 
It takes 6 hours to glue to actually get everything, so I lest it over night, because we have lesson the very next day.

And on today's lesson I checked my work, sanded some edges with sanding paper and I'm done. So I got my project and went upstairs to do my Blogg and the final question in theory part. We have to use Maths rules to find the total surface area of our desk tidy. So, that's what I'm going to do now. 

This my desk tidy, completed and ready to be used.


However, next time I will try to do better, because as we can see my desk tidy is far away from perfect. Next time, I will measure everything better and make sure all the points are at the same place, and everything is perfect.
I'm going to keep this desk tidy on my table till the end of the term and then I'm going to give it to my mom. 

Tuesday, August 20, 2013

Post 10

On today's lesson I started glueing. Now I have my boxes all glued and ready. A also glued a base to the two small boxes. I had couple of problems this lesson. One of them was using a glue. Because a person who used it before me, didn't close it properly so it stacked and didn't want to come out. But then Mr Andrews fixed it. Another problem occurred during the actual process of gluing things together. When I did so, I realized that some of my edges are not that straight and that affected on the shape of my boxes, as they are not perfect squares. But unfortunately I can't fix it any,ore. S I need to get over it and try harder and more accurately next time. However, I still looks alright, I might use sanding thing (the one when you use this long thing) at the end to fix the edges. A other thing that I thought went not the way I wanted it to, was that the angle of my banded part(the wall and the base) wasn't 90° exactly so the boxes, which walls are 90° wouldn't fit in, so I had to move both of them forward a bit. So I have a small gap there, but no one will be able to see it because of my top boxes.
When I' ll  finish all of the things that I want to and when I' ll fix all the problems that I have, my desk tidy will look good and will help me to organize things on my desk:)
That's what I have so far:


Monday, August 19, 2013

Post 9, research question n. 3

INJECTION MOLDING OF POLYMER 


Injection Molding is a process in which molten polymer is forced under high pressure into a mold cavity through an opening (sprue).

Polymer material in form of pellets is fed into an Injection Molding machine through a hopper. The material is then conveyed forward by a feeding screw and forced into a split mold, filling its cavity through a feeding system with sprue gate and runners.

Injection Molding machine is similar to Extruder. The main difference between the two machines is in screw operation. In extruder screw rotates continuously providing output of continuous long product (pipe, rod, sheet). Screw of injection molding machine is called reciprocating screw since it not only rotates but also moves forward and backward according to the steps of the molding cycle.

It acts as a ram in the filling step when the molten polymer is injected into the mold and then it retracts backward in the molding step.

Heating elements, placed over the barrel, soften and melt the polymer.

The mold is equipped with a cooling system providing controlled cooling and solidification of the material.

The polymer is held in the mold until solidification and then the mold opens and the part is removed from the mold by ejector pins.

Injection Molding is used mainly for Thermoplastics, but Elastomers and Thermosets are also may be extruded. In this case cross-linking occurs during heating and melting of the material in the heated barrel.

A principal scheme of an Injection Molding Machine is shown in the picture.

polymer injection molding.png 

Injection Molding is highly productive method providing high accuracy and control of shape of the manufactured parts. The method is profitable in mass production of large number of identical parts.

Thermoplastics commonly used in Injection Molding are as follows:

Injection Molding is used for manufacturing DVDs, pipe fittings, battery casings, toothbrush bases, bottle lids, disposable razors, automobile bumpers and dash boards, power-tool housing, television cabinets, electrical switches, telephone handsets, automotive power brake, automotive fascias, transmission, and electrical parts, mirror housings, steam irons, washer pumps, spoilers, butter tubs, moisture vaporizers, yogurt containers, toilet seats, cell-phone housings, cradles or bases for personal digital assistants, case of a notebook-computer, computer mouse, electrical connector housings, lawn chairs, automotive ashtrays, and cookware appliance handles and knobs, aerosol caps, household items, bottle caps, toys. 

Post 8, research question 2

Question 2.

Industrial name        Common name                  Properties                                  Uses


1)PVC.                       Poly(vinyl chloride).        Strong rigid solid                  Pipes, siding, flooring
2)PVAc                   Poly(vinyl acetate)        Soft,sticky solid                          Latex paints, adhesives

Thursday, August 15, 2013

Post 7

On today's lesson I was fixing some stuff that I messed up last lesson:)
Well, I banded the base, so now I have it as an "L" shape(if you look on it from the side"
And because its not exactly 90° angle, so my boxes didn't fit in into the right place. So I've decided to cut their back wall, so it's of this shape:           
                                                                       |__|


That's how I will be able to glue the side parts to the wall. For the boxes on the bottom part I don't do the "floor" or bottom part because my new base now has it. But I need the "floor" for top boxes. I've already cut it, sanded and now I just need  to glue everything together. I'm pretty happy with the work I've done today and that I found a way to fix all of my things. Next time I will have to glue everything together and take a picture of my final project. 
And I really need to start my research thing. 

Tuesday, August 13, 2013

post 6, question 1

I've decided that I have to start doing the research questions, otherwise I won't have time to finish them in time as a lot of assignments keep coming up.

1.     Choose 2 machines that you used in the fabrication of your desk tidy. With these machines in mind, outline WPH&S considerations that must be adhered to when using these machines. Include photographs of your chosen machines (OnGuard may be an excellent resource for this question).
 
 
BAND SAW:
Considerations that should take place:

  • Only one person using the machine at one time
  •    Any hair should be tied back or in a hair cap
  • when cutting the pieces, if one of the pieces should be moved, don't move it with your hands, sue something else to move it and then pick it up
  •  if dropped something, don't go down with your head close to the machine, move it with your foot and then pick it up
  •      Safety glasses must be worn
     blade should be in properly

2) SANDER:


Considerations that should take place:
  •  Safety glasses must be worn 
  • Make sure sanding disc and belt is in good condition
  •    Make sure you know what direction the belt and disc in going
  • don't put hands too close to sander
  • hair should be always tied at the back
  • just one person in each work area

Thursday, August 8, 2013

5 post

On last lesson I started banding my pieces. I had problem with one of my pieces, because I banded it, there was a small space left over. Then I decided to redo it. But when I redone it, I got the same thing, then I thought that i can fix it by putting second box in there. I think, that it is confusing on words, but I'll try to take a picture of it and then it will be easier to understand what I mean.
On last lesson I've done just 2 boxes, so next lesson I have to do so much work to do, as our project has to be finished at the end of week 5 or on the first lesson of week 6. Because we have to start doing our theory research questions.
Here is plan for me to complete on the next lesson:
1) Glue two boxes
2) Band 2 other pieces and make 2 more boxes
3) And finally glue everything together.

Tuesday, August 6, 2013

4 post

On today's lesson we were doing our projects. I'm up to a stage of banding my plastic pieces. But on today's lesson I was sanding the edges. Because I have long but small in width pieces I couldn't use the big sander, because its a bit scary and dangerous to do. So I asked Mr Andrews to sand them on small sander. That meant that I had to divide the long piece into 3 parts and sand them separately. Starting with left side, then middle part and the right one at the end. But because I couldn't really control everything to make the surface exactly flat, I had to use sanding paper afterwards. 
When I did it, I took the paper off(the paper that is on top of the plastic) and Mr Andrews said that my adages are not quite flat. So I had to work on them more with this paper. But because my plastic doesn't have any protection on it-I have to work really carefully because I can damage plastic surface. 
On the next lesson I will have to fix my edges and then if I'll have time, I will probably start banding my plastic and put all the pieces together. I don't think I'll get up this stage, but I'll try to, because then I can have more time to work on my theory part of an assignment.

Monday, July 29, 2013

3 post

On last lesson I've started doing prototype of my desk tidy from cupboard. While doing that I've realized some things that I had to change and I actually changed them during the process. I changed lengths of the sides so I could use less cupboard. I have 4 small "boxes" where I'm going to put my jewelry. I think I'll finish my prototype next lesson, and when I do-I'm going to put a photo of it on the Blogg.  

Thursday, July 25, 2013

2nd post


Well, on yesterday's lesson I realised that we are allowed to make a desk tidy for our jewellery. So I've decided to change my design. I'm going to put my rings, necklaces, earrings a d some other things in there. I think 4 'boxes' will be more than enough. As our desk tidies has to be not bigger than 20 by 20 by 20 cm, so I've decided to make it 20cm in height, 10 cm in width and 14 cm in length. My new design looks like so: 
And here are some 1:1 scale drawings of my desk tidy.

Tuesday, July 16, 2013

term 3, post 1

On todays lesson we started doing our new assignment which is desk tidy. Firstly we had to do research of different desk tidies and then start planning our own desk tidy. In the internet I found a lot of desk tidies of different shapes and colours. But I need to look at all of the examples and make my own desighn, not copy of someone's design. We firstly had to decide what thigs we were going to put into our desk tidy. I'm going to put there my Iphone, a cup, pencils and pens,and some paper sheets. So I need a desk tidy that can fit in all of these things. Here are some pictures that I found in the internet.

-I really like this desk tidy because there is a space for the phone, some paper, pens, pencils and small things.

-I don't really like the design and I think it's too small. 

-this one looks modern, interesting, good for teenager, but there is no place for my phone and a cup, so I don't think this design will be the best for me.-This desk tidy includes a lot of different trays for paper, small things,etc. But I don't really like the way it's done and I think that this desk tidy will take a lot of space on my table.


And here are some of my drawings.


And this is my final one, that I really want to make.
Here is my design of desk tidy with a stand for my iPhone, a space for a cup, a box for pens and pencils and a small box for the small things. It also has space for paper at the back. The stand fornthe iphone is small because it doesn't need all 4 walls, so it has just one short wall at the front that will stop the phone from falling. I will also be able to put some paper at the back of the desk tidy and stand for pens and pencils. I also tried to find a desk tidy that have a place for a cup and I decided to place my cap in the middle of the desk tidy. It doesn't have any walls because I need to get it out and put it back as easy as possible. 


Wednesday, June 5, 2013

5th post

on todays lesson I've finished doing my lamp in the program ProDesktop.
I've done my base, aluminium piece and the LED bulbs and put al the parts together. I had some trouble with turning the pieces and putting them under one angle. But yesterday Mr Andrews showed us how to do it. It was still confusing but I tried couple of times and then I finally got the right angle I wanted and put all the pieces togeter.
this is the picture of my finished lamp


Thursday, May 30, 2013

4th post

On today's lesson we were doing our lamps. I had some trouble with putting two parts together.
I've finished my aluminum piece and timber piece, I needed just to put these two together so that they are connected. But the problem was that they were on different angle and I don't know how to make them be on the same angle. So, on the next class I will have to borrow a book and look it up.

Term 2 questions.

Design Technology questions.


CAD stands fro Computer-Aided Design

A prototype is an early sample or model built to test a concept or process or to act as a thing to be replicated or learned from. It's important because that us how you can check whether your project is going to work or not. If not, how can you fix it and make it better.

Rapid Prototyping (RP) enables the quick fabrication of physical models using three-dimensional computer aided design (CAD) data. Used in a wide range of industries, Rapid prototyping allows companies to turn innovative ideas into successful end products rapidly and efficiently.

before rapid-prototyping, prototype should be sketched. To see the elementary design of all the details of the machine(project)

Additive manufacturing or 3D printing[1] is a process of making a three-dimensional solid object of virtually any shape from a digital model.

CNC means Computer Numerical Control. This means a computer converts the design produced by Computer Aided Design software (CAD), into numbers. The numbers can be considered to be the coordinates of a graph and they control the movement of the cutter. In this way the computer controls the cutting and shaping of the material.

A STL file is a format used by Stereolithography software to generate information needed to produce 3D models on Stereolithography machines.In fact, the extension "stl" is said to be derived from the word "Stereolithography." The surface of an object is broken into a logical series of triangles. Each triangle is uniquely defined by its normal and three points representing its vertices.

3rd post

On last lesson we were doing our lamps on ProDesktop. I had a bit of trouble with it. I had a small piece on the top of my sketch, which was not connected to other two parts( profile and path) that's why I couldn't make my profile go along the path to create an aluminum piece of my lamp.
But when I saw it and deleted it, everything was good.
That what I got at the end of the lesson.
On today's lesson, I'll probably start doing my timber piece which is a base of my lamp.

Thursday, May 23, 2013

2nd post

On today's lesson Mr Andrews was away. He left the work for us to do. Which is to finish our IPhones and then start working on our lamps.
I finished doing my IPhone and started working on the design of my lamp. But unfortunately I had just time to make a shape of my lamp.
Next lesson I will work on the shape of my lamp and the actual lamp.

Wednesday, May 22, 2013

Term 2. 1st post

This term we are working on the program called ProDesktop. It's a computer program that creates 3D projects. For last couple of lessons we were practicing our skills in the program. We've designed a pull toy, an IPhone and couple of others. For our assignment we have to hand it all the projects that we've done so far, plus the design of our lamps that we created last term.
I was so confused with making design of my IPhone, but I think it's all good now.

We also have questions that we have to answer, which then will help us to write a 500-words paragraph about design technology and the ProDesktop.
I nearly finished my iPhone, I think I'll need 10 minutes on the next lesson to finish it and them I'll start working on my lamp.
I'm also half trough the questions.

Thursday, March 21, 2013

Questions

Questions

What is the actual difference between light of different colours?


The frequency of the EM wave determines the amount of amount energy it contains. Therefore, different colors of light have different frequencies and amount of energy.


How slow can we make light go?


When light passes through different media its speed slows. The slowest speed recorded is through sodium at -272 C during which the speed of light fell to 60kph – about the speed of a bicycle.


3. What does light symbolise in the following painting of the Greek god Prometheus wielding the flame of a torch?


It symbolizes the fact that The Prometheus came to people to give people light. Another reason is probably that he came to help people and here the light could be defined as help.


4. Fill in definitions for the following lighting concepts:
Ambient light

The soft indirect light that fills the volume of a room with illumination.

Direct light

Illumination on a subject or area that goes directly from the front of the luminaire in a straight line to the subject

Warm white

“Warm white” is the same colour temperature as the standard inefficient incandescent, imparts a more orange/red light on objects, is normally associated with red or orange objects.


Diffuser


A light fixture, such as a frosted globe, that spreads light evenly.


Watts

An International System unit of power equal to one joule per second.
Luminosity

the quality of being luminous; emitting or reflecting light; "its luminosity is measured relative to that of our sun"
Efficiency

The ratio of the energy delivered (or work done) by a machine to the energy needed (or work required) in operating the machine.


5. Fill in the table below describing the different kinds of lighting available:
Picture Name Feature Use
Ambient light Light source is covered by diffuser This type of light source is mainly used to provide the scene with a basic view of the different objects in it. Eg. Desk lamp
Spot light Bright, direct light, narrow beam, no diffusion. searchlights or spotlights are used in advertising, fairs, festivals and other public events. Eg. Lights in the art center
Pendant light Light can be diffused or directed down; hangs from ceiling; usually a design feature. Pendant lights are often used in multiples, hung in a straight line over kitchen countertops and dinette sets or sometimes in bathrooms. Eg. Lights in the bathroom
Task light Light points downward; often articulated; no direct light to eyes. Often task lighting refers to office lighting, where the task light is used to increase illuminance on the reading area. Eg. Desk light


LEDs come in several shapes. List three kinds of lighting they can replace.

a. Standard


b. Globe


c. Candle


Evaluation

Evaluation

Comment of the following Design Aspects of your ecolamp:

Ergonomic
Aesthetics
Function
Economics


The lamp that I did looks good. The design looks interesting and it could be put in any room with any design style because it's base which is made of timber and it's wooden colour and the aluminium piece will also look good with everything really. And because the lamp is going to be a present for my mother and we'll probably put it in her office. All the furniture that is there, is wooden so the lamp is going to be in perfect balance with the style of her office. The shape of my lamp is also fashionable, doesn't take a lot of space, what is really good for the offices because there is always not enough space.
The lamp is bright and it lights up quite a big space. What is also good because sometimes my mother stays at work late and therefore she needs a lot of light. The LEDs are putted just at the end of aluminium piece so that the light coming from it wouldn't be too bright or too dim. Because on the lamp is LED light, it saves quite a big amount of energy and therefore it saves that extra amount of money that my mother payed for the light from normal light bulbs.


Insert a colour photograph of your finished LED lamp.